video-retalking一键整合包下载
video-retalking一键整合包
1 环境安装
下面是官方安装:
git clone https://github.com/vinthony/video-retalking.git
cd video-retalking
conda create -n video_retalking python=3.8
conda activate video_retalking

conda install ffmpeg

# Please follow the instructions from https://pytorch.org/get-started/previous-versions/
# This installation command only works on CUDA 11.1
pip install torch==1.9.0+cu111 torchvision==0.10.0+cu111 -f https://download.pytorch.org/whl/torch_stable.html

pip install -r requirements.txt
下面是升级安装:
升级到python 3.11.7 cuda12.1 torch2.2+cu121 torchvision0.17.0+cu121
git clone https://github.com/vinthony/video-retalking.git
cd video-retalking
conda create -n video_retalking python=3.11.7
conda activate video_retalking

conda install ffmpeg

# Please follow the instructions from https://pytorch.org/get-started/previous-versions/
# This installation command only works on CUDA 11.1

## pip install torch==1.9.0+cu111 torchvision==0.10.0+cu111 -f https://download.pytorch.org/whl/torch_stable.html
#因当前系统用的是cuda12.1 【环境变量指定的cuda12.1,显卡驱动自带12.3】
    安装torch 2.2.0+cu121 、torchaudio 2.2.0+cu121 、torchvision  0.17.0+cu121
pip install torch torchvision torchaudio --extra-index-url https://download.pytorch.org/whl/cu121


pip install -r requirements.txt

pip list |findstr torch
torch                     2.2.0+cu121
torchaudio                2.2.0+cu121
torchvision               0.17.0+cu121
2 问题
1 :dlib报错
   raise CalledProcessError(retcode, cmd)
      subprocess.CalledProcessError: Command '['cmake', 'C:\\Users\\Administrator\\AppData\\Local\\Temp\\pip-install-hf6sqkug\\dlib_464b0f67234b4e379fc80e8624de74bb\\tools\\python', '-DCMAKE_LIBRARY_OUTPUT_DIRECTORY=C:\\Users\\Administrator\\AppData\\Local\\Temp\\pip-install-hf6sqkug\\dlib_464b0f67234b4e379fc80e8624de74bb\\build\\lib.win-amd64-cpython-311', '-DPYTHON_EXECUTABLE=D:\\Software\\miniconda3\\envs\\video_retalking\\python.exe', '-DCMAKE_LIBRARY_OUTPUT_DIRECTORY_RELEASE=C:\\Users\\Administrator\\AppData\\Local\\Temp\\pip-install-hf6sqkug\\dlib_464b0f67234b4e379fc80e8624de74bb\\build\\lib.win-amd64-cpython-311', '-A', 'x64']' returned non-zero exit status 1.
      [end of output]

  note: This error originates from a subprocess, and is likely not a problem with pip.
  ERROR: Failed building wheel for dlib
Failed to build dlib
ERROR: Could not build wheels for dlib, which is required to install pyproject.toml-based projects手动安装 dlib 的二进制包whl
注释掉 require.txt 文件中的 #dlib==19.24.0
pip install dlib-19.24.1-cp311-cp311-win_amd64.whl
Processing d:\software\ai\videoretalking\video-retalking\dlib-19.24.1-cp311-cp311-win_amd64.whl
Installing collected packages: dlib
Successfully installed dlib-19.24.1
2 推理报错
python inference.py –face examples/face/1.mp4 –audio examples/audio/1.wav –outfile results/1_1.mp4
python inference.py  --face examples/face/1.mp4  --audio examples/audio/1.wav   --outfile results/1_1.mp4
Traceback (most recent call last):
  File "D:\Software\AI\VideoReTalking\video-retalking\inference.py", line 16, in <module>
    from third_part.GPEN.gpen_face_enhancer import FaceEnhancement
  File "D:\Software\AI\VideoReTalking\video-retalking\third_part\GPEN\gpen_face_enhancer.py", line 11, in <module>
    from utils.inference_utils import Laplacian_Pyramid_Blending_with_mask
  File "D:\Software\AI\VideoReTalking\video-retalking\utils\inference_utils.py", line 5, in <module>
    from models import load_network, load_DNet
  File "D:\Software\AI\VideoReTalking\video-retalking\models\__init__.py", line 2, in <module>
    from models.DNet import DNet
  File "D:\Software\AI\VideoReTalking\video-retalking\models\DNet.py", line 10, in <module>
    from models.base_blocks import LayerNorm2d, ADAINHourglass, FineEncoder, FineDecoder
  File "D:\Software\AI\VideoReTalking\video-retalking\models\base_blocks.py", line 9, in <module>
    from basicsr.archs.arch_util import default_init_weights
  File "D:\Software\miniconda3\envs\video_retalking\Lib\site-packages\basicsr\__init__.py", line 4, in <module>
    from .data import *
  File "D:\Software\miniconda3\envs\video_retalking\Lib\site-packages\basicsr\data\__init__.py", line 22, in <module>
    _dataset_modules = [importlib.import_module(f'basicsr.data.{file_name}') for file_name in dataset_filenames]
                       ^^^^^^^^^^^^^^^^^^^^^^^^^^^^^^^^^^^^^^^^^^^^^^^^^^^^^^^^^^^^^^^^^^^^^^^^^^^^^^^^^^^^^^^^^
  File "D:\Software\miniconda3\envs\video_retalking\Lib\site-packages\basicsr\data\__init__.py", line 22, in <listcomp>
    _dataset_modules = [importlib.import_module(f'basicsr.data.{file_name}') for file_name in dataset_filenames]
                        ^^^^^^^^^^^^^^^^^^^^^^^^^^^^^^^^^^^^^^^^^^^^^^^^^^^^
  File "D:\Software\miniconda3\envs\video_retalking\Lib\importlib\__init__.py", line 126, in import_module
    return _bootstrap._gcd_import(name[level:], package, level)
           ^^^^^^^^^^^^^^^^^^^^^^^^^^^^^^^^^^^^^^^^^^^^^^^^^^^^
  File "D:\Software\miniconda3\envs\video_retalking\Lib\site-packages\basicsr\data\realesrgan_dataset.py", line 11, in <module>
    from basicsr.data.degradations import circular_lowpass_kernel, random_mixed_kernels
  File "D:\Software\miniconda3\envs\video_retalking\Lib\site-packages\basicsr\data\degradations.py", line 8, in <module>
    from torchvision.transforms.functional_tensor import rgb_to_grayscale
ModuleNotFoundError: No module named 'torchvision.transforms.functional_tensor'


---
from
  torchvision.transforms.functional_tensor import rgb_to_grayscale
to:
 torchvision.transforms.functional import rgb_to_grayscale


from
torchvision.transforms.functional_tensor import rgb_to_grayscale
to:
torchvision.transforms.functional import rgb_to_grayscale
指定升级安装。pip install torch==2.2.0 torchvision==0.17.0 torchaudio==2.2.0 –index-url https://download.pytorch.org/whl/cu121 还是报错。
最终把 D:\Software\miniconda3\envs\video_retalking\Lib\site-packages\basicsr\data\degradations.py 第8行改为如下:
from torchvision.transforms.functional import rgb_to_grayscale
#去掉functional 后面的_tensor
问题解决。
3:numpy 报错:
python inference.py  --face examples/face/1.mp4  --audio examples/audio/1.wav   --outfile results/1_1.mp4
[Info] Using cuda for inference.
[Step 0] Number of frames available for inference: 135
[Step 1] Using saved landmarks.
[Step 2] 3DMM Extraction In Video::   0%|                                                                               | 0/135 [00:00<?, ?it/s]
Traceback (most recent call last):
  File "D:\Software\AI\VideoReTalking\video-retalking\inference.py", line 345, in <module>
    main()
  File "D:\Software\AI\VideoReTalking\video-retalking\inference.py", line 103, in main
    trans_params, im_idx, lm_idx, _ = align_img(frame, lm_idx, lm3d_std)
                                      ^^^^^^^^^^^^^^^^^^^^^^^^^^^^^^^^^^
  File "D:\Software\AI\VideoReTalking\video-retalking\third_part\face3d\util\preprocess.py", line 196, in align_img
    trans_params = np.array([w0, h0, s, t[0], t[1]])
                   ^^^^^^^^^^^^^^^^^^^^^^^^^^^^^^^^^
ValueError: setting an array element with a sequence. The requested array has an inhomogeneous shape after 1 dimensions. The detected shape was (5,) + inhomogeneous part.
pip install numpy –upgrade 自动安装到最新版本报错了。改为 pip install numpy==1.23.5
问题解决.
3 使用
Please download our pre-trained models and put them in ./checkpoints.
运行
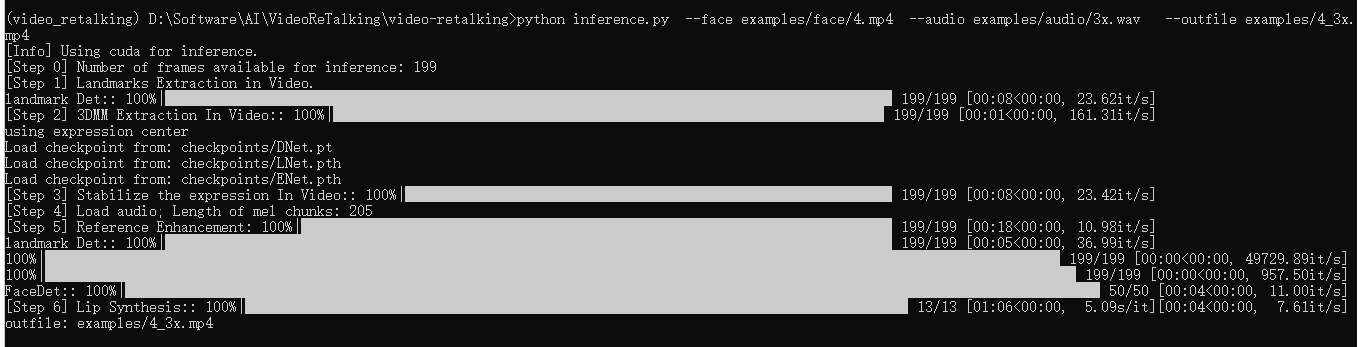
python inference.py –face examples/face/4.mp4 –audio examples/audio/3x.wav –outfile examples/results/4_3x.mp4
(video_retalking) D:\Software\AI\VideoReTalking\video-retalking>python inference.py  --face examples/face/5_00.mp4  --audio examples/audio/3x.wav   --outfile results/5_00_3x.mp4

[Info] Using cuda for inference. #使用 CUDA 在 GPU 上进行推理
[Step 0] Number of frames available for inference: 300 #有 300 帧可用于推理
[Step 1] Landmarks Extraction in Video. #进行视频中的人脸关键点(landmark)提取
landmark Det:: 100%|██████████████████████████████████████████████████████████████████████████████████████████████████████████████████| 300/300 [00:10<00:00, 29.98it/s]
[Step 2] 3DMM Extraction In Video:: 100%  #进行 3DMM (3D Morphable Model)提取,在视频里,3DMM 可以用来估计 3D 面部结构和脸部表情。
████████████████████████████████████████████████████████████████████████████████████████████| 300/300 [00:01<00:00, 182.98it/s]
using expression center #加载 `DNet.pt`, `LNet.pth`, `ENet.pth` 这些训练好的模型权重文件
Load checkpoint from: checkpoints/DNet.pt
Load checkpoint from: checkpoints/LNet.pth
Load checkpoint from: checkpoints/ENet.pth
[Step 3] Stabilize the expression In Video:: 100% #是对视频中的表情进行稳定。这一步可以消除视频帧间的微小抖动,并稳定脸部表情 ████████████████████████████████████████████████████████████████████████████████████| 300/300 [00:12<00:00, 23.96it/s]
[Step 4] Load audio; Length of mel chunks: 205 # 是加载音频文件,并将音频数据切割成一块块
[Step 5] Reference Enhancement: 100%|#是对输入的视频进行增强,使其可以作为口型合成的良好参考。 #█████████████████████████████████████████████████████████████████████████████████████████████████| 205/205 [00:19<00:00, 10.73it/s]
landmark Det:: 100%|██████████████████████████████████████████████████████████████████████████████████████████████████████████████████| 205/205 [00:05<00:00, 36.91it/s]
100%|██████████████████████████████████████████████████████████████████████████████████████████████████████████████████████████████| 205/205 [00:00<00:00, 45457.70it/s]
100%|████████████████████████████████████████████████████████████████████████████████████████████████████████████████████████████████| 205/205 [00:00<00:00, 946.96it/s]
FaceDet:: 100%|█████████████████████████████████████████████████████████████████████████████████████████████████████████████████████████| 52/52 [00:11<00:00,  4.69it/s]
[Step 6] Lip Synthesis:: 100%|#是进行口型合成。这一步将音频信息与视频脸部动画结合在一起,生成与音频匹配的脸部动画
███████████████████████████████████████████████████████████████████████████████████████| 13/13 [01:27<00:00,  6.70s/it]
outfile: results/5_00_3x.mp4 #合成的结果视频将被保存到指定的输出文件中
这个过程的各个步骤:
- 运行 python inference.py 命令,输入的参数包括
--face(输入的脸部视频)、--audio(输入的音频),以及--outfile(输出的视频文件名)。 - 使用 CUDA 在 GPU 上进行推理,这会大大加快处理速度。
[Step 0]表示有 300 帧可用于推理。[Step 1]是进行视频中的人脸关键点(landmark)提取。[Step 2]是进行 3DMM (3D Morphable Model)提取,在视频里,3DMM 可以用来估计 3D 面部结构和脸部表情。- 加载
DNet.pt,LNet.pth,ENet.pth这些训练好的模型权重文件。 [Step 3]是对视频中的表情进行稳定。这一步可以消除视频帧间的微小抖动,并稳定脸部表情。[Step 4]是加载音频文件,并将音频数据切割成一块块。[Step 5]是对输入的视频进行增强,使其可以作为口型合成的良好参考。[Step 6]是进行口型合成。这一步将音频信息与视频脸部动画结合在一起,生成与音频匹配的脸部动画。- 最后,合成的结果视频将被保存到指定的输出文件中,即
results/5_00_3x.mp4.
4 整合包优化
整合包下载: video-retalking一键整合包下载。